Generally speaking, a cloud provider provides IT services remotely. If we want to host a Webflow site on the cloud or even any application, we will not have to use our own servers but those of the host directly. Organizations that use the cloud will be able to access resources on a “pay-as-you-go” model rather than buying and deploying the servers they need internally. Thus, cloud users will be able to consume the host's resources on demand and in an automated manner from a catalog open to all customers.
In our case, a site developed on Webflow can be hosted on Azure by deploying a Static Web App resource in the cloud, and connect with other services, such as Azure SQL to connect to the CMS (who knows...).
Azure is therefore a cloud service offered by Microsoft. Among other cloud providers, we can find AWS from Amazon or even GCP from Google.
The cloud has several advantages:
Hosting a Webflow site on Azure will therefore allow you to benefit from all the above advantages. Attention, this does not mean that hosting directly on Webflow servers is not secure or unreliable. Hosting a site on the cloud will just allow you to have more possibility of managing the services offered.
{{cta-1}}
For this tutorial we will take the example of a static site developed on Webflow. First, we will export the HTML, CSS and JS code generated by Webflow during development on the editor.

Webflow will offer us to download a compressed folder that we will download and decompress.

The next step is to create a GitHub Repository to place the code of our Webflow site there. To Do This, Go To github.com/new (we will leave this public repository so as not to waste time on Git authentication).
The purpose of hosting on GitHub will be to select this Repository as the source code to host our Webflow site on Azure.

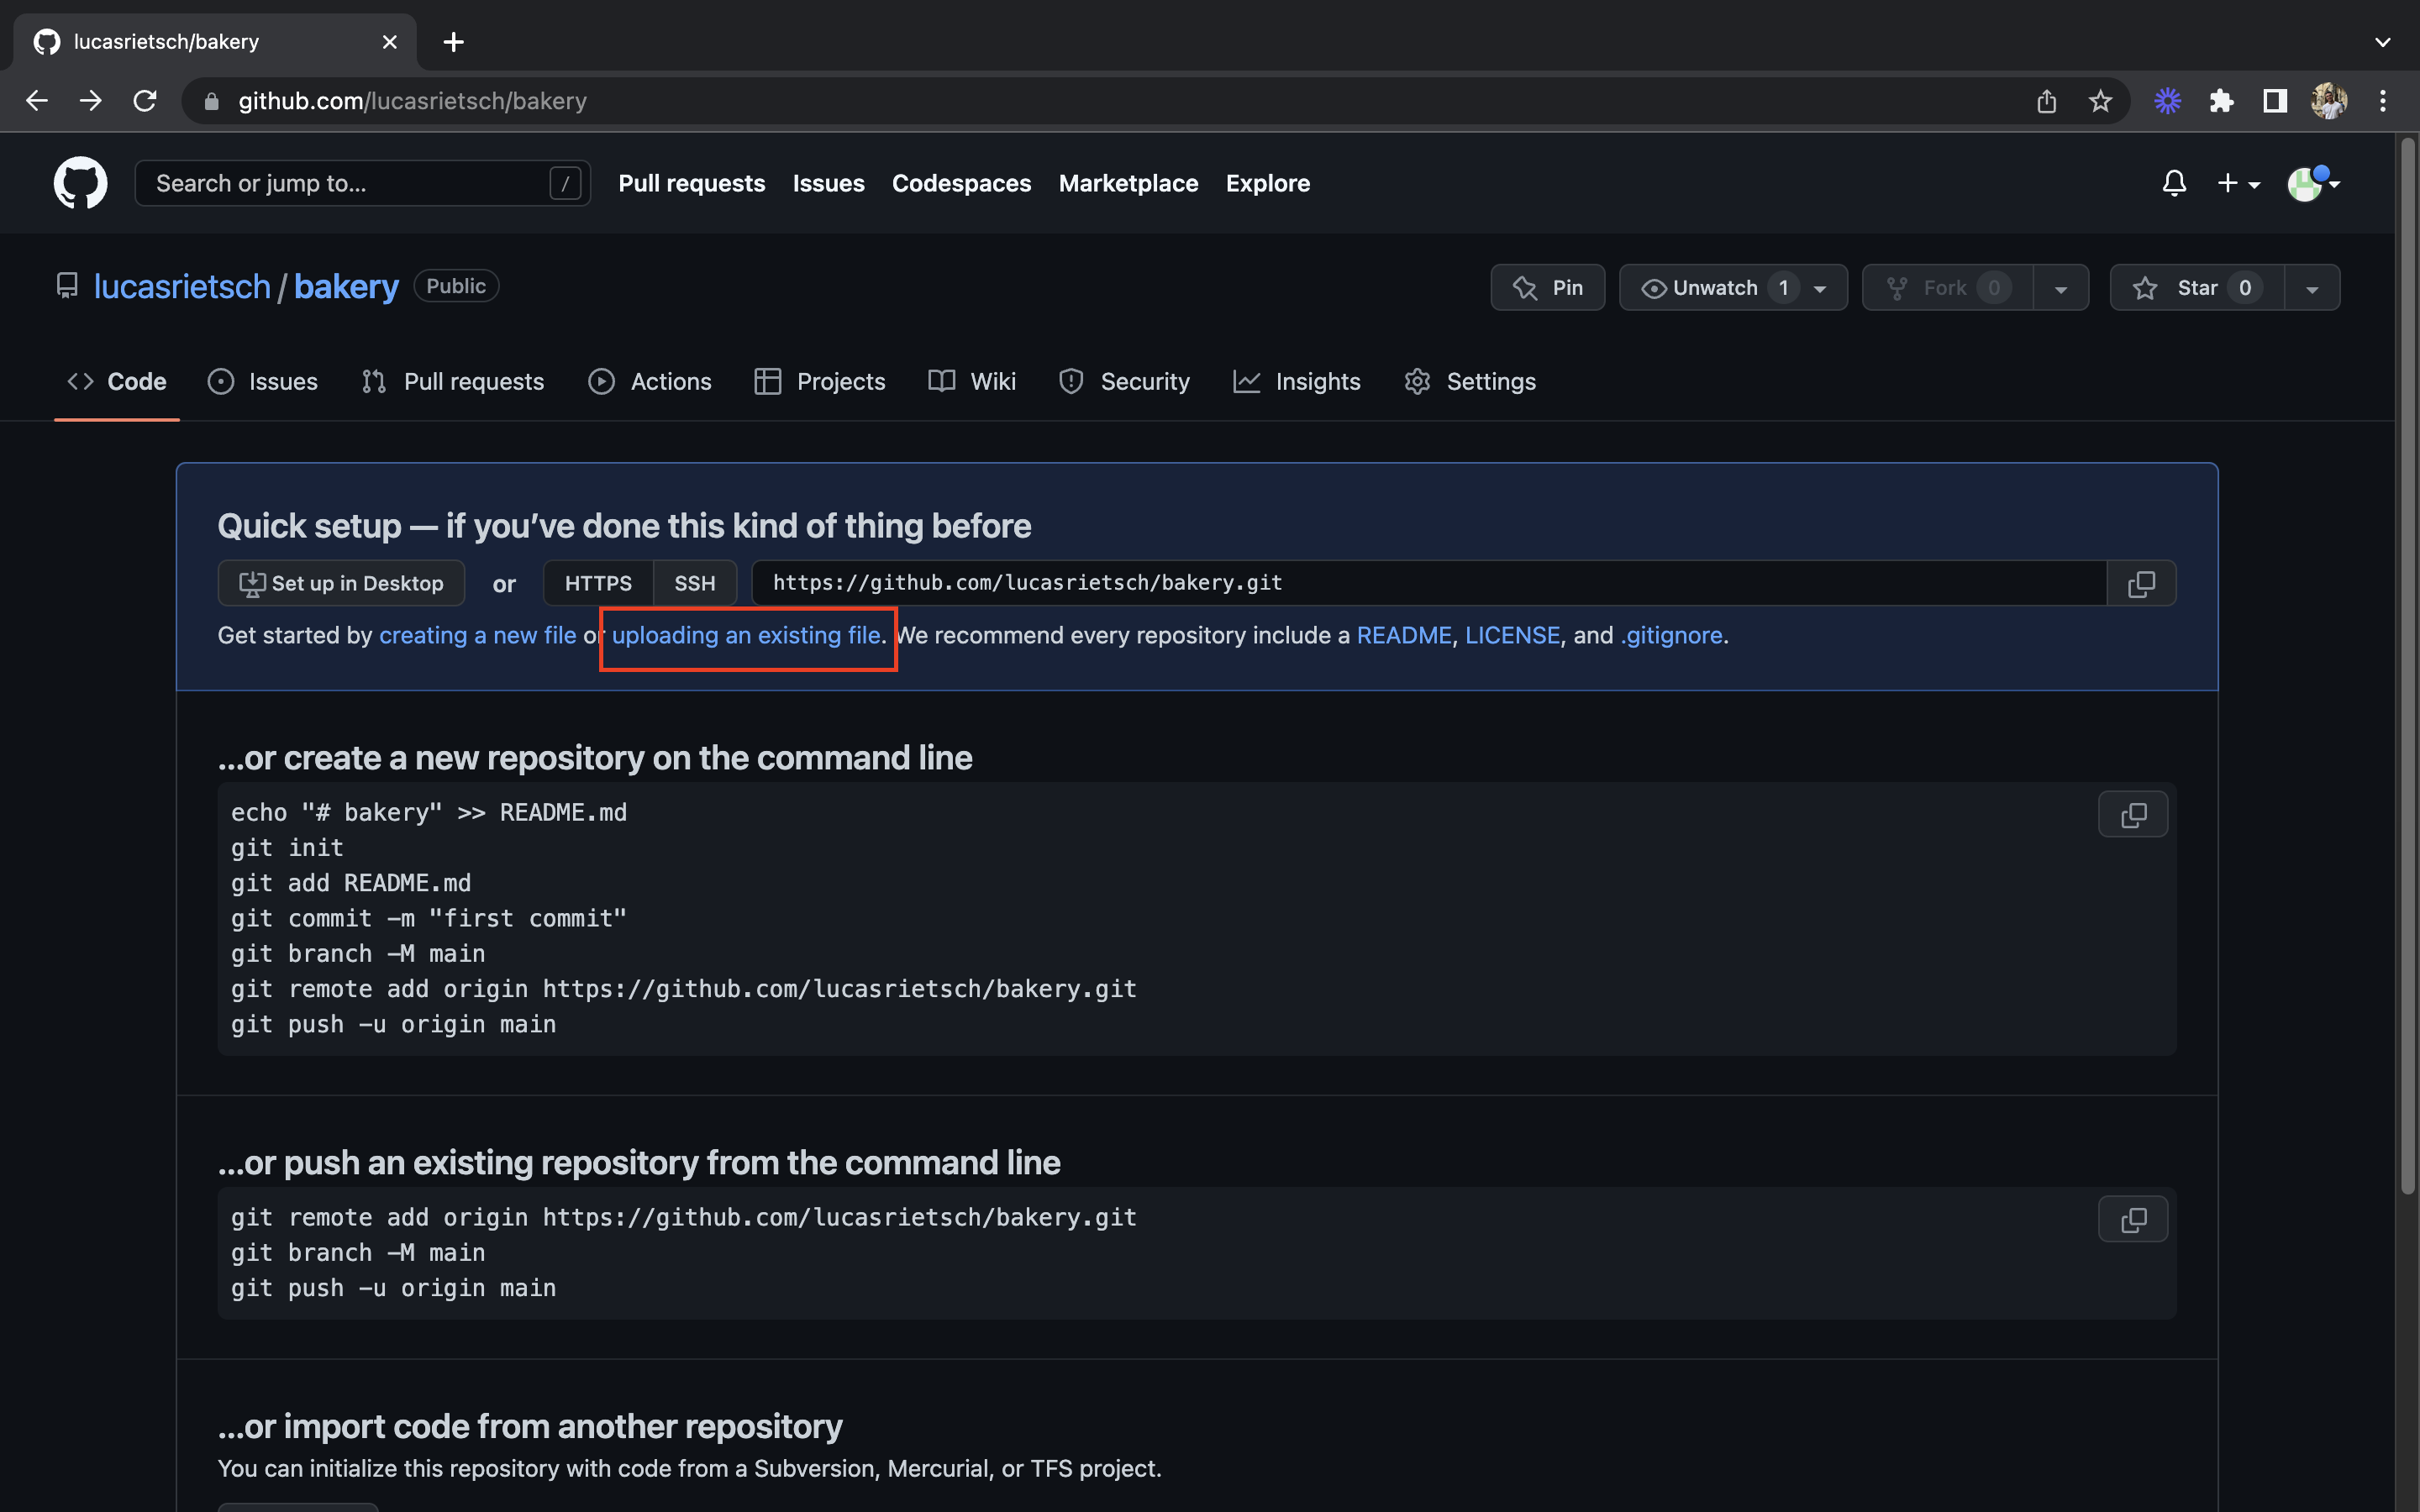
We will then upload our files by clicking on the following link (without forgetting to validate our uploads by clicking on the “Commit changes” button)

That's it! We hosted our code generated by Webflow on GitHub.
Now Let's Get to the Heart of the Matter: The Azure Portal (or portal.azure.com). We will not focus on creating the Azure account, but it will be a challenge for the future.
The first step is to create a Static Web App (which will be the resource needed to deploy our Webflow site on the Azure cloud).

After clicking on the “Create” button, we will be asked for various entries to create our resource.

Select the Resource Group where you want to deploy your Web App, or create a new one directly. Next, give your web app a name and then select the region where you want to deploy it.

The last step is to define the deployment parameters for our Web App, which we will use to host our Webflow site on Azure.
After selecting GitHub as a source, we will need to connect to our GitHub account, then select the organization, the repository and the desired branch.
Finally, we will finish by defining the parameters of the Build that will allow us to build and deploy our Webflow application on Azure.
Since Webflow generates HTML and CSS code, here we need to select Custom, then leave the app source at “/” and the output at “./”.
Now let's click on “Review + create”, then on “Create”, and our resource will be deployed. This may take a few minutes.
Once the Web App is deployed, we can access it via the “Go to resource” button or directly by searching for “Static Web Apps” in the search bar.

A URL is made available by Azure to access the Web App deployed via our GitHub code.

It's all good! We successfully deployed our Webflow site on the Azure cloud.
To redirect our Webflow site to a custom domain, nothing could be easier. Let's go to our Web App, “Custom Domains” tab.
In case your domain is hosted elsewhere than on Azure, simply click on “Add” → “Custom domain on other DNS”. Enter your domain name and then copy the displayed CNAME record information to paste into your domain's DNS zone. Validating this step may take a few minutes, so don't worry if it doesn't work directly.

After a few moments, you will therefore be able to see your Webflow site on your own domain name, all thanks to hosting on Azure.
So we saw the different steps required to host a static Webflow site on Azure. The next line of work will be to find a way to use the Webflow CMS via the Editor or the Designer, while having the site hosted on Azure. The challenge here will be to automate the CMS base between the modifications on Webflow and the final display on Azure. Elias's teams are currently working on a solution that would allow everyone to host a Webflow CMS site on Azure.


